Developed with JSP, Java, AJAX software technologies, Çözüm Quality Management System is an efficient structure to transmit ISO standards, the documents related to quality (remedial and blocker action forms, document modification request form, annual training program etc.) to electronic environment.
The Quality Management Module contains basically quality planning and quality control functions.
The Quality Management Module plays an active role in all processes like raw material supply and product sale and usage.
It operates in all processes like raw material supply, receiving the product by the client, corrective/blocker activities, inter-corporation control, customer complains.
If we regard the advantages of Quality Management Module;
Access to all data as quality tests that are renewed previously, control methods, exemplify, control plans,
Standardization in all processes,
Information flow automation with work-flow,
Amelioration of the processes through following the processes and task correction application of quality notification,
We can state control main data and planning support options,
The Quality Management Module enables to stock the documents in particular categories, the follow-up of added documents, traceability, to add corrective/blocker applications into the system and to provide its follow-up, to modify the documents and revising, to demand a revision and follow this process, to warn the users and provide its follow-up, to conduct a survey by authorized users, to make a list of distribution, to display the survey results both numerical and graphical.

Menu > modül seçim > kalite yönetimi seçilir.KYS sorumlusu Kalite Yönetim formunu, diğer kullanıcılar Kalite Takip formunu açar
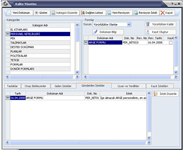
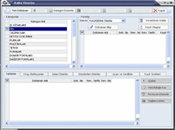
You choose Menu > Choose Module > quality management. Quality Management System (QMS) responsible opens Quality Management Form and the other users open Quality Follow-up form.
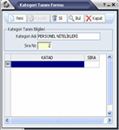
QMS responsible can open a new category, edit and delete the old ones with Edit Category button.
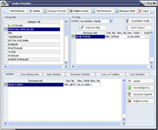
You can see all categories in Category Panel. When QMS responsible and other users choose a category, they can see current revisions of documents in that category and in Form Panel. While QMS responsible is able to see all these, other users can only see intra vires their services documents.
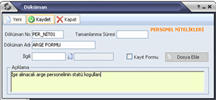
Clicking the New Document button, QMS responsible opens Document form and and can create new documents under the categories that he chose previously in category panel.
He/she enters the required informations and adds this document into the system with Save button. This document appears on draft panels, entering automatically with a beginning revision. This beginning revision have not a number yet.
QMS responsible can edit the informations for saved document and press the Save button so as to save the modifications.
After the saving action, Add button gets active and clicking here; we can add the document to new revision.
We open a form in which we can display the files in the system with Add button in Send File form. We choose the necessary file and we confirm the selection with open button.
In order to send the file, click the Send button.
After adding a file, clicking Add button, you can realize the same actions as well.
If QMS responsible wants to create one and more documents, clicking New button, he can operate the same actions for a new document.
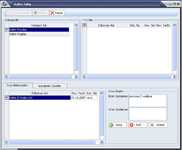
QMS responsible sees the new revisions on Draft panel.
New created documents appear in this panel, and they have not a revision number. But in fact they are the beginning revisions. The documents whose revision arrangement are operated, have revision numbers.
It is possible to create and modify revision informations in that panel and to make a distribution list, to display the related file or to reactivate.
You can see the attached document, clicking the Display button.
Clicking the Edit Revision button, you open a form in which revision informations are being edited.
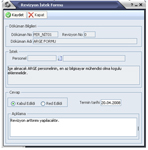
You open Document Inf. Form
The document informations whose revisions will be edited, are displayed in Document Informations Panel.
You will display formerly entered data in Rsvision Information panel and new data can be entered. If we made a modification, we must click save button so as to confirm.
You can operate adding file action with the help of Add File button.
In order to operate this revision, select personnel on Confirmation Informations Panel, click demand confirmation button. The personnel for whom we demanded the confirmation, are being listed below. Selecting on the list, clicking Delete button, we can cancel the confirmation.
You open a form in which the distribution list is edited with Edit Authority button.
After selecting a service from service box and clicking save button, you add that service to distribution list. Selecting a service on the list and clicking cancel service button, you de-list that service.
The personnels that do not appear in the list, can not see this document, when a revision related to this document, put into action.
Clicking put into action button; this revision starts to being operated.
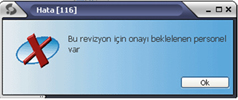
If there are personnels that wait for a revision confirmation, QMS responsible receives a warning message and can not operate required action.
QMS Responsible can carry out this transaction without waiting the others confirmation.
QMS responsible creates a new revision for this document by selecting a document on the form panel and clicking new revision button on tool bar. This form has the same functionality with Edit Revision but there are some differences because of not having a formerly created revision.
It is impossible to add a file without entering and saving the revision data.
It is impossible to demand a confirmation without entering and saving the revision data.
After saving; new revision takes its place on draft panel and current revision continues to stay on the form panel.
Display button on tool bar serve to see attached file of a current revision on the form panel.
Other users apart from QMS responsible can see revision drafts that must be confirmed by them on the confirmation panel.
They can see the request of QMS responsible.
Clicking the confirmation button, you can confirm this revision and clicking the Refuse button, you can refuse.
They can display this file with Display button
The confirmed drafts are removed from that panel, the refused drafts proceed to stay if the required modifications are made.
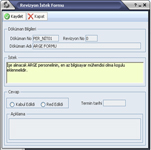
Other users except QMS responsible, selecting the current revision on the form panel, clicking Demand Revision button, open Demand Revision form and they can want QMS responsible to create a new revision.
They explain what kind of a modification they demand QMS responsible to make, on the demand panel.
They can see the answer of QMS responsible on response section as well.
After all the modifications, they save the related information and if required they can re change.
After saving, this request appears on Sent Requests panel. Clicking Edit Request button, you open the same form, can edit it and control the answer.
QMS responsible answers the revision demands, after analyzing the revision demands on Received Demands panel. Then he/she clicks Display Received Demand button.
You can see the information of the personnel who made the request and demand explication informations.
On the answer panel, you enter the answer data for the related demand.
Clicking Save button, you save the informations
Revision demanding, sent demands and the operations that will be confirmed, belong to other user except QMS responsible, offered to QMS responsible as well;
To introduce the module, giving full use authorization to QMS responsible,
To enable to use the module hierarchically for the personnel in the event of having one more than QMS responsible in the system.
SURVEY
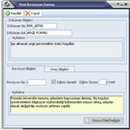
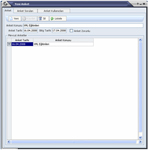
1. In order to make a survey and enter it into the system, you enter a topic, on Survey tab and Survey topic text. You enter the date on Survey Date text. You enter the ending data of survey application on Ending Date. If the field that is required to fill, is selected; it means to fill in all blanks for the survey user and to display it.
After entering these data, clicking Save button, you can save the survey to the system. If required, clicking List button, you can list the surveys. Clicking Delete button, you can delete the survey. In order to make a survey, clicking New button, you can display a blank screen.
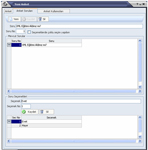
2. We have seen the saving process above. After selecting a topic and saving, passing to survey questions tab, you add survey questions for the related survey and alternative choices for each question.
.
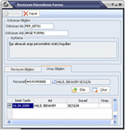
You type the question on Question text, that you want to be asked. You numerate to each question. If the multiple choice check is marked, you can select one and more option. If this box is not marked, the user can only select just one option.
Afterwards, we create options for the questions that we have already saved on grid. We write the content of selection text as it is like in the question and enter the selection number to No text. Clicking Save button, we can go next step of “create a selection”. Clicking Delete button, you can delete the question selection in the survey.
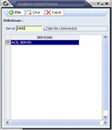
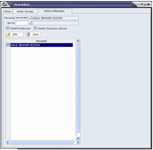
3. We formed all the questions and the choices for each question in the survey. We choose the personnel that we want him/her to be able to see the survey as personnel based. If we want to make an authorization as service based, we choose the service on service Text. If we want them to fill in the survey or to see the survey result, we mark these choices and add the person into the system clicking Save button. Clicking Remove button, we can remove the person from the system. (it is possible to prevent that person to access to the system)
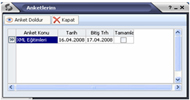
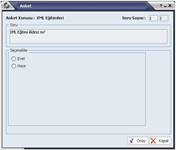
-If the person who opens this form, is defined in the Survey form, he/she will be able to see the survey on grid. Here the Last Survey Record that we have previously seen above. Double clicking this line or clicking Fill in a Survey button, we answer the survey if he/she has filling survey authorization.
.
MEETINGS
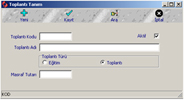
1. Meeting; After logging in Çözüm Personnel Program, it is possible to create it from the form of Definitions, Meeting Definitions, Define a New Meeting on the menu. Besides, it is possible to see previously defined meetings.
2. After creating a meeting, we enter the data of personnel that will participate to this meeting. On the menu of Employee's Personnel Information, on the form of Training and Meetings, New Training and Meeting, after entering the participant personnel data, clicking Save button, we add the related person into the meeting list of participants
3. When the person who is added into the meeting list, logs in the program, he/she will be added automatically to the meeting list of participants.


